This lesson is an ideal ring construction test for first-year apprentices and includes a demonstration of how to create a claw setting.
The online video is currently free.
Step 1:

This project requires a 6mm round faceted stone and 3mm x 3mm x 6mm square sterling silver wire.
Make sure that the silver is annealed and cut off 15mm. This will be formed into the setting later.
Step 2:
Roll the longer section of wire through the flat rolls until it’s around 1.4mm thick. The width will also spread slightly.
The 15mm section needs to be wider. Roll it short ways until it is around 5mm wide, and then roll it long ways until it’s around 1mm thick. Then, anneal and pickle.
Step 3:
Use the following calculation to work out the correct strip length to form the setting: Stone diameter plus half the metal thickness multiplied by pi.
Once you’ve filed the ends to the correct size, use your round nose pliers to bend it into a bezel shape as best you can.
Step 4:
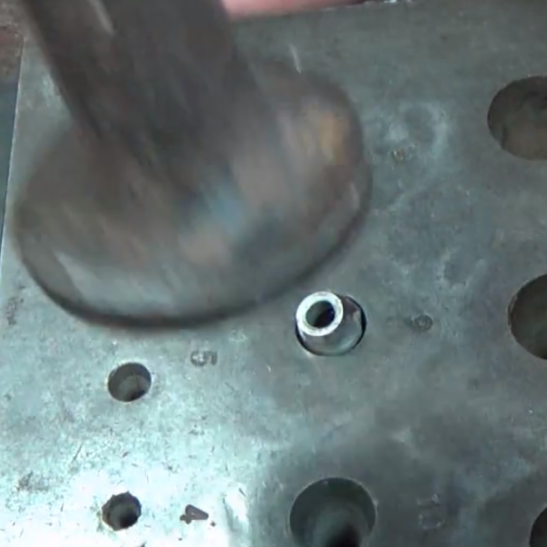
You can only do so much by hand—the collet block will do most of the work. Hammer it into your block from both ends until the joint closes tight and there are no gaps. Do not use the punch at this stage. Now hard solder the joint.
Step 5:
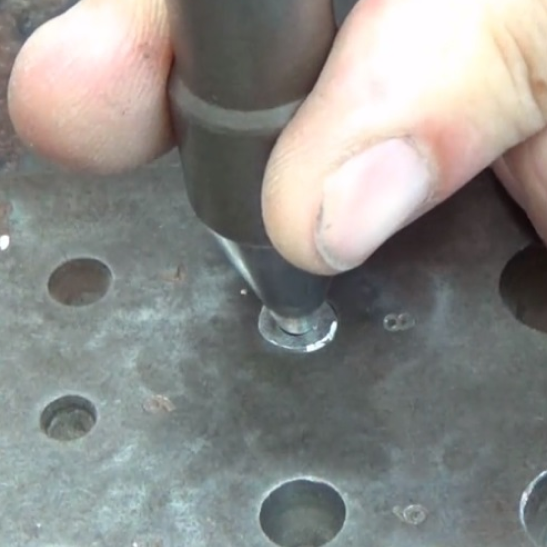
Begin to form the conical shape by hammering it into the block without using the punch. Hammer the bezel into the 8mm collet hole until it is all the way in. You can then finish forming the bezel using the tapered punch.
Step 6:
Work out the required finger size with the following calculation: Inside ring measurement plus the shank thickness, multiplied by pi.
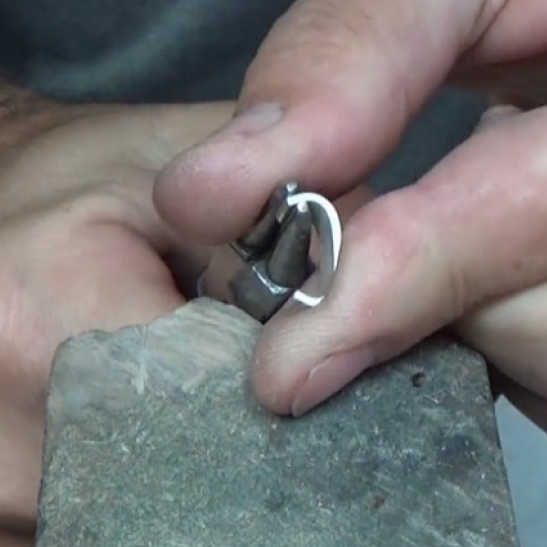
Cut the strip and form the ring with half-round pliers or a ring bender, then hard solder the joint.
Step 7:
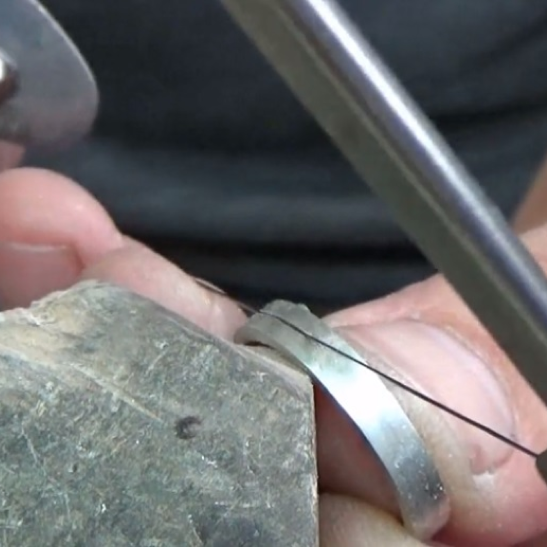
Once you have shaped and sized the ring on your mandrel, scribe a centre line along the ring opposite the solder joint with your dividers. The line should be approximately 18mm long.
Use a 5/0 or 4/0 saw blade to cut along the line carefully. Keep the blade tight and lubricated.
Step 8:
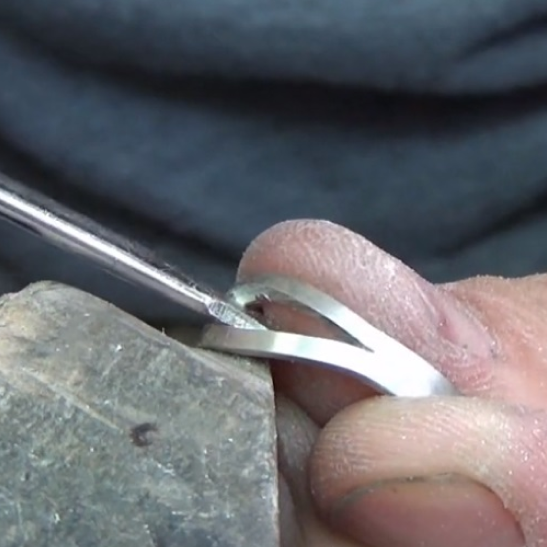
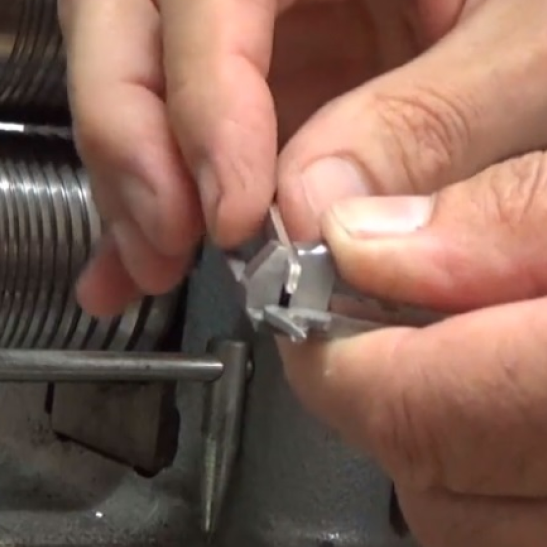
Once you have cut the split into the ring, begin to prize it apart, first with a pen knife and then with a screwdriver.
Carefully twist the tool to open the split shank until the setting starts to fit in.
Step 9:
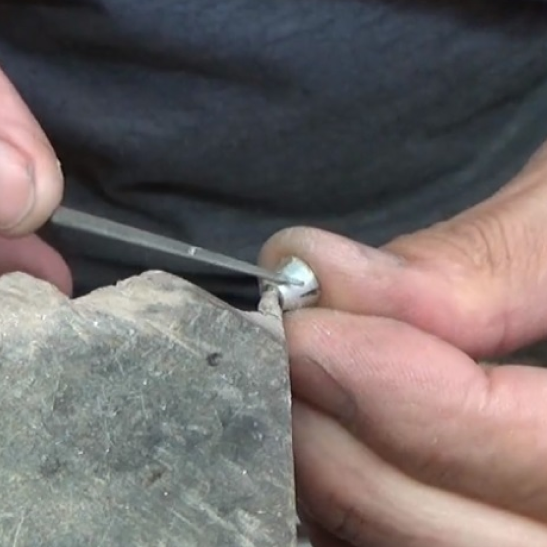
Soften the edges of the shank and split the shoulders to make them half round with files and emery paper.
File two opposing slots at the bottom of the bezel setting, then make any necessary adjustments to the shoulder gap until the bezel setting clicks in place.
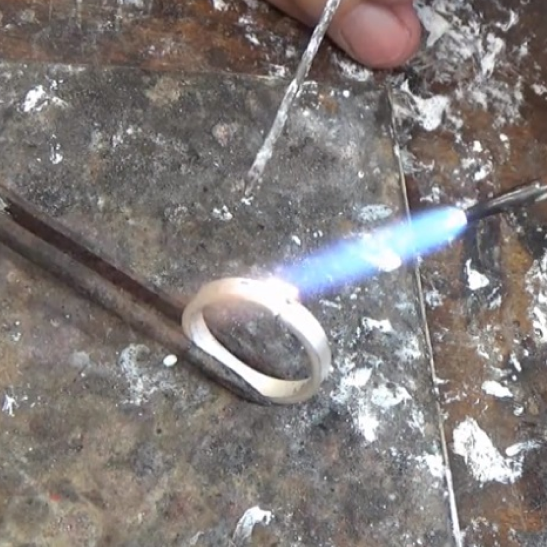
Step 10:
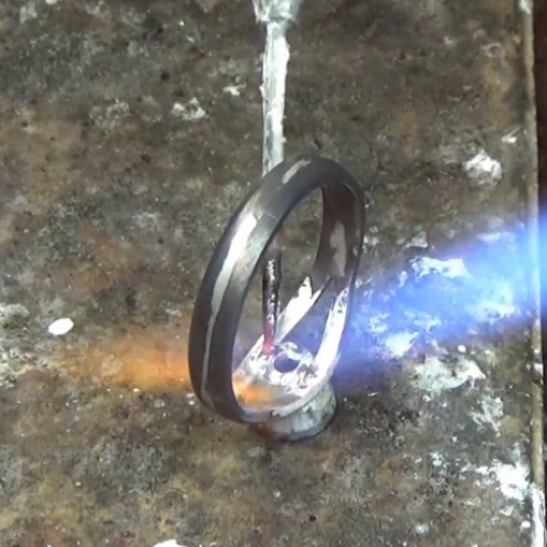
The bezel should fit firmly onto the ring perfectly straight and level. Solder the two components together with medium-grade solder, then pickle.
Emery cleaned any tool marks off and prepared the ring for polishing.
Step 11:
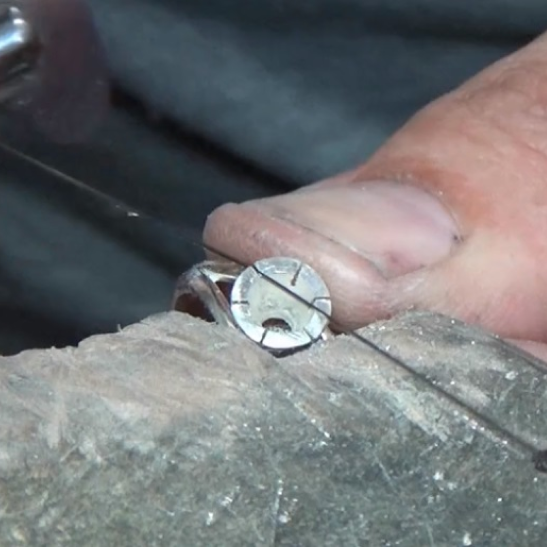
Mark six even points on top of the bezel where the gallery loops will be cut out. Start the cutting process with a piercing saw, then follow these cuts with a three-square needle file. As the loops widen, ensure that the claw width will be no less than 1mm wide.
Step 12:
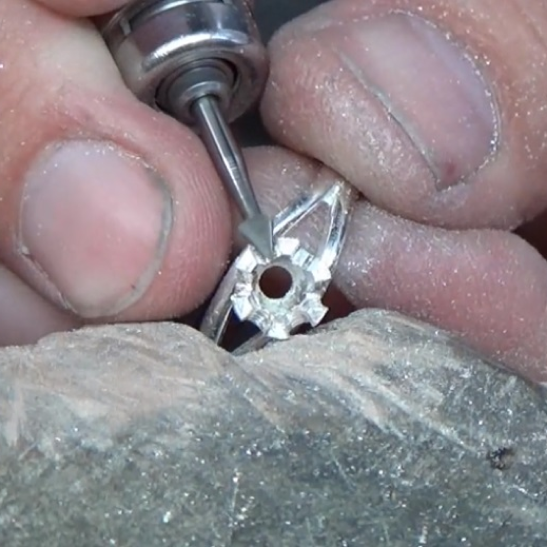
The final shaping of the gallery loops can be done with either a cone bur or a bud bur.
Before you set the stone, tumble the ring or polish it with a black bristle brush and cotton mop.
The online video will show you how to set the stone.
Jewellery Training Solutions offers a comprehensive online training service including the popular Ten Stage Apprenticeship Course helping to train the next generation of jewellers.
Check out the free course: jewellerytrainingsolutions.com.au/courses/split-shank-ring