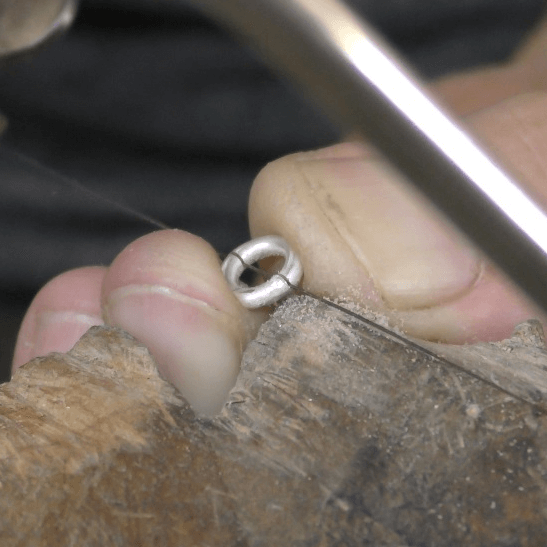
Step 1:
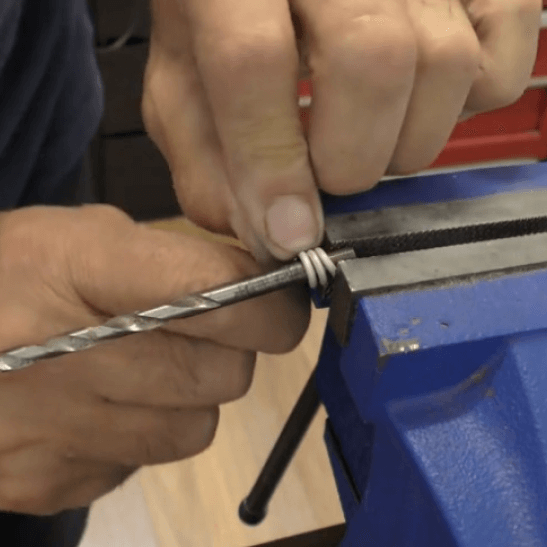
This project requires 6mm round stones and 1.8mm x 130mm annealed round wire. You can use any size stone, but make sure you have a stake that is 1mm smaller than the stone diameter. Wrap the wire two times around the stake. Here, I’m using the shaft of a 5mm drill.
Step 2:
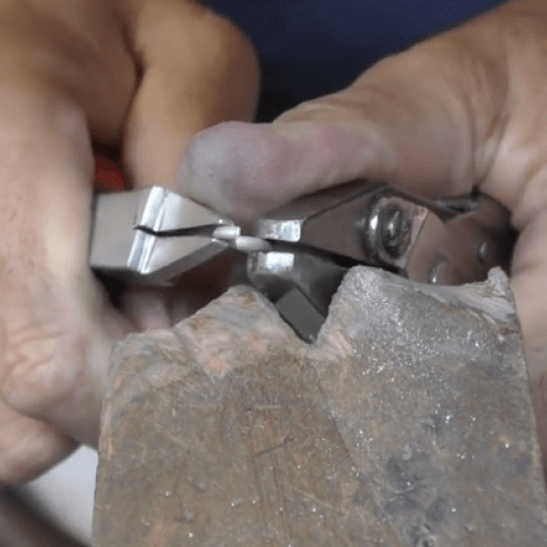
Cut the jump rings off from the coil and close them, making sure that the joint is tight and perfectly lined up.
Step 3:
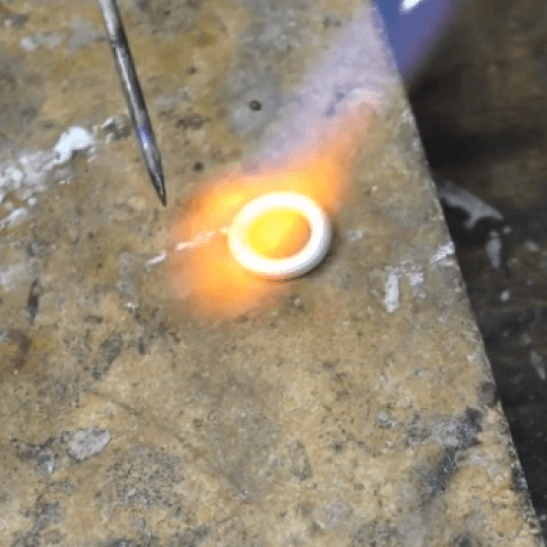
Solder the joints with hard-grade solder, then pickle to remove the oxides.
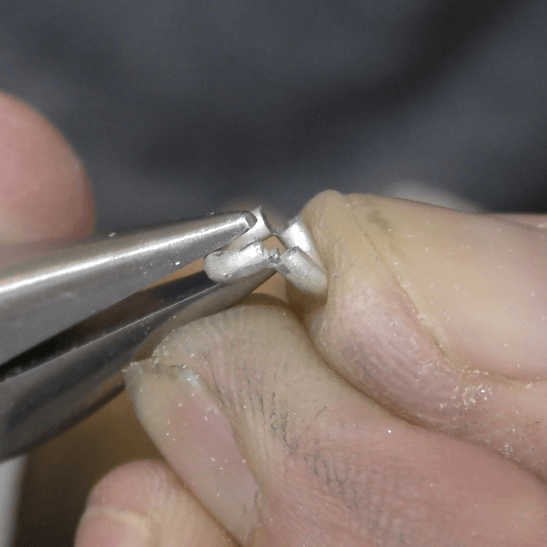
Step 4:
To make the basket of the setting, start cutting one of the jump rings in half. Ensure that one of the cuts is on the solder joint. Cut approximately 90 percent through. Do not cut all the way as we will bend the jump ring at this point.
Step 5:
Carefully bend the two halves of the jump ring into a ‘V’ shape. Aim to make the angle around 60 degrees. It should bend easily, so cut the joints a little further if you find it difficult to bend.
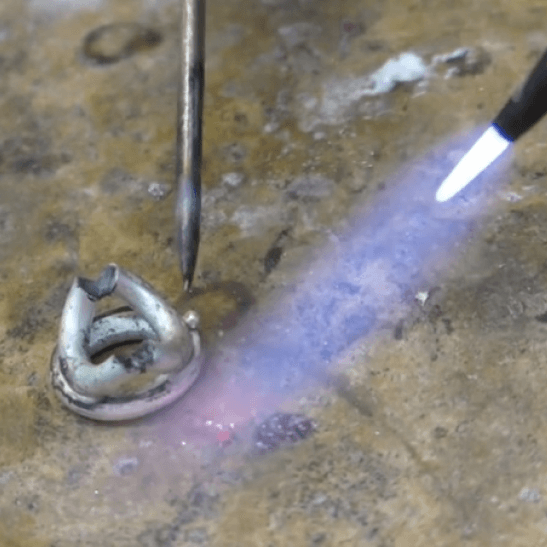
Step 6:
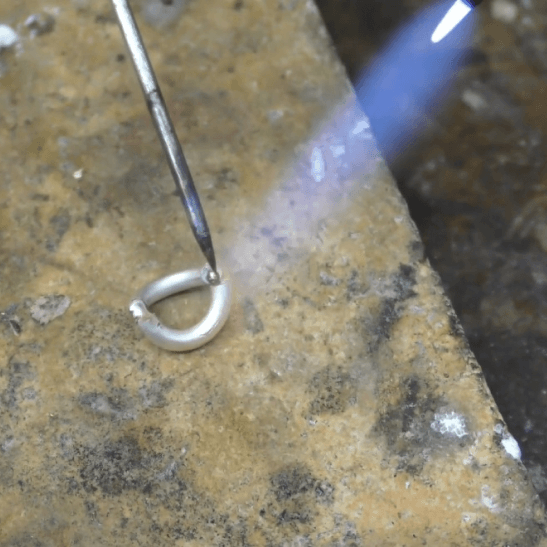
Once it is bent into the correct angle, strengthen the joints by hard soldering them. Use a generous amount of solder as you will need to bur into the joints later.
Step 7:
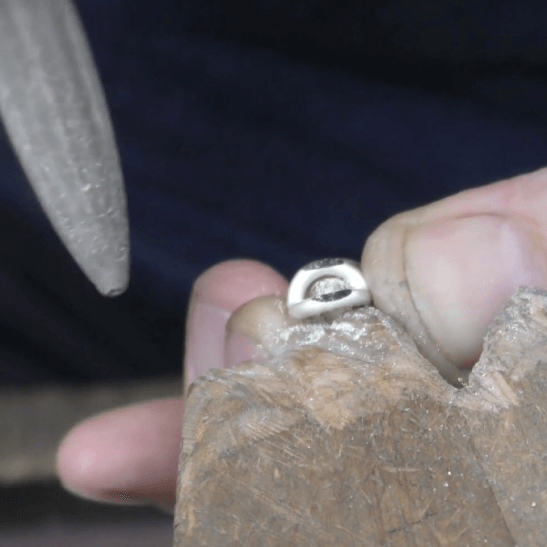
Once the basket has been pickled, file a flat spot across the top. File at least halfway into the thickness, and ensure you file it evenly and perfectly in the centre.
Step 8:
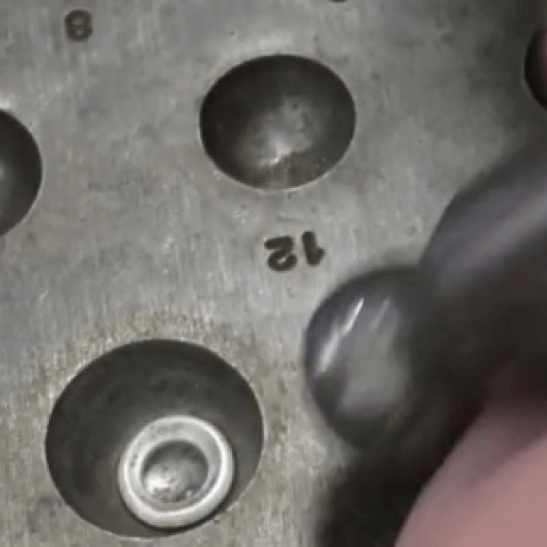
Now, turn your attention to the top of the setting. Use your dapping block to dome the jump ring and reduce the thickness. I’m using the 16mm dome hole.
Step 9:
File a flat profile on the bottom of the domed bezel until the two components fit neatly together. Flux the joints and line them up perfectly. Solder the two contact joints using medium-grade solder.
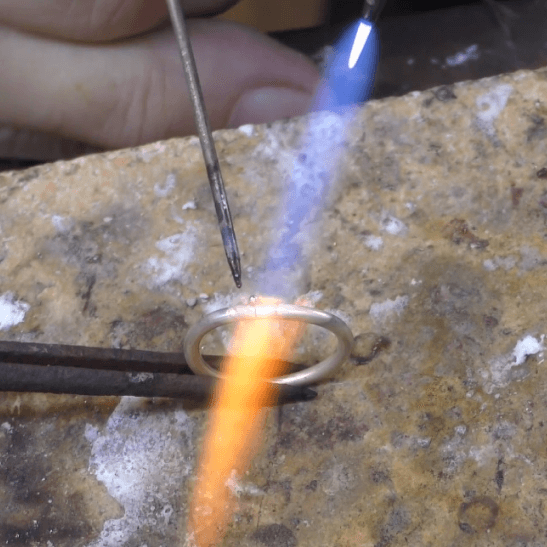
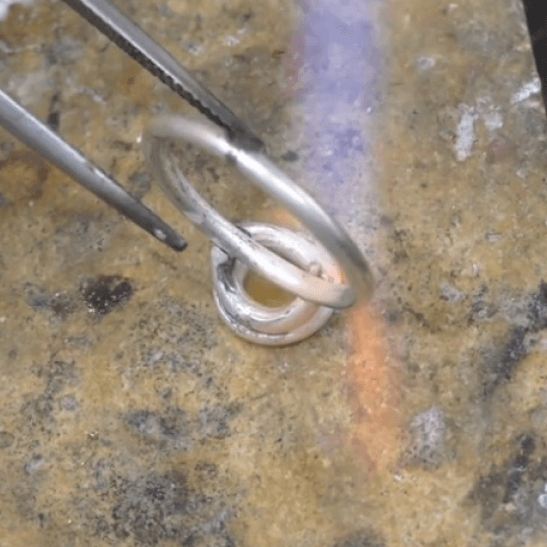
Step 10:
Use the remainder of the wire to form the ring to the finger size of your choice. Hard solder the joint and remove the tool marks with emery paper.
Step 11:

Use a round bur no bigger than 1.8mm to shape the open joints of the basket. The head of the ring and shank should fit together without any gaps.
Step 12:
Position the ring upside-down and ensure the shank is soldered perfectly square to the setting. Pickle and remove any excess solder before tumbling and polishing it.
The ring can now be set using a technique of your choice. In the online video, I demonstrate how to set the stone using the Ezi-Set pliers.
Jewellery Training Solutions Online Courses. Find the video here: jewellerytrainingsolutions.com.au/courses/jump-ring-solitaire
Jewellery Training Solutions offers a comprehensive online training service, including the popular Ten Stage Apprenticeship Course, helping to train the next generation of jewellers.
Check out the courses and options at jewellerytrainingsolutions.com.