This project is a great one to help beginners get a feel for commercial ring-making. The ring can done with minimal tools and the following metal: 1.5mm and 1mm round wire and 0.6mm x 3mm x 20mm strip. I’m using a 5mm round faceted stone, but any size or shape works.
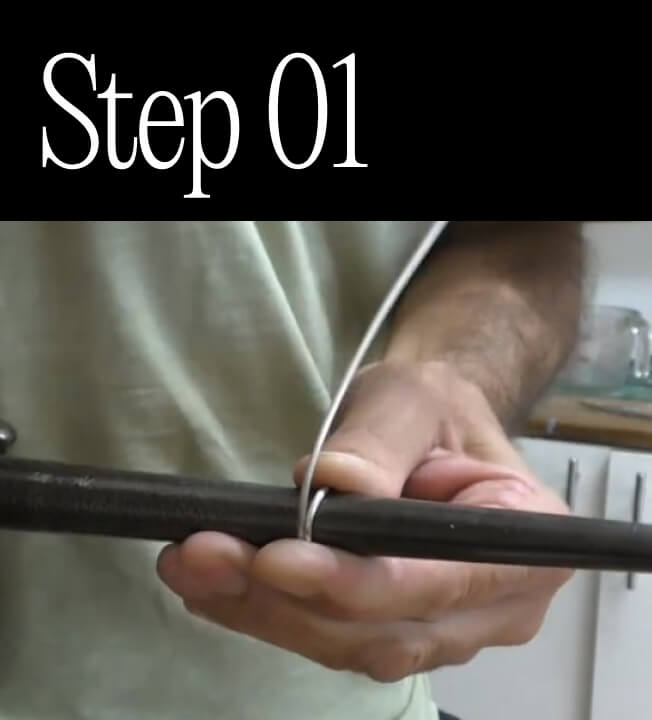
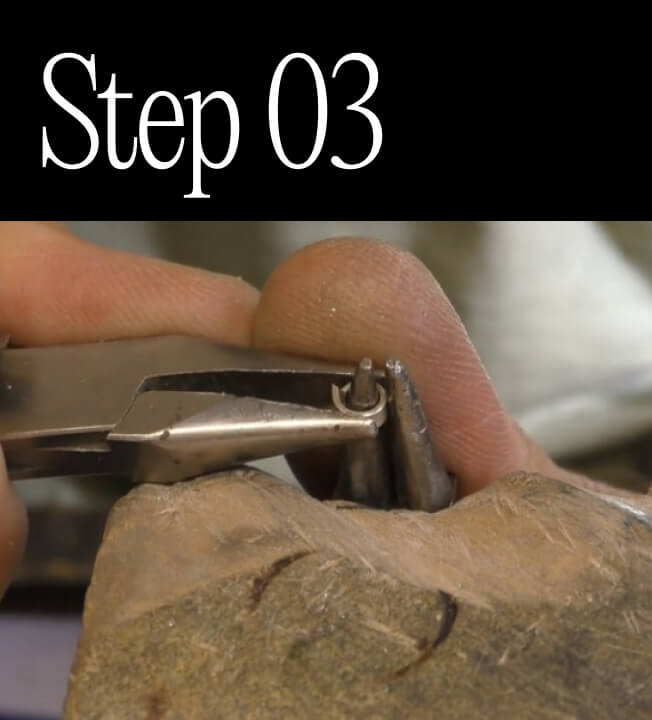
We will start by making the round wire ring. Wrap the 1.5mm wire tightly around your mandrel at the sharp end. Ensure the wire overlaps, then work it up the mandrel to your chosen finger size using your mallet whilst you turn it. Now, cut the excess wire off.

Cross the ends of the ring to apply tension and line the joint up perfectly. Flux and solder using any grade. The joint will be opened up later, so perfection is not required. Pickle to remove the oxides. Make sure the ring is perfectly round and flat using your mandrel and flat stake.
Perform a calculation for the bezel strip measurement. The bezel must not be seen when viewed from the top, so use the following formula: stone diameter x 3.14. Cut the strip to length and use your round nose pliers to form the bezel. Close the joint as tight as possible using the overlapping technique with round and chain nose pliers.
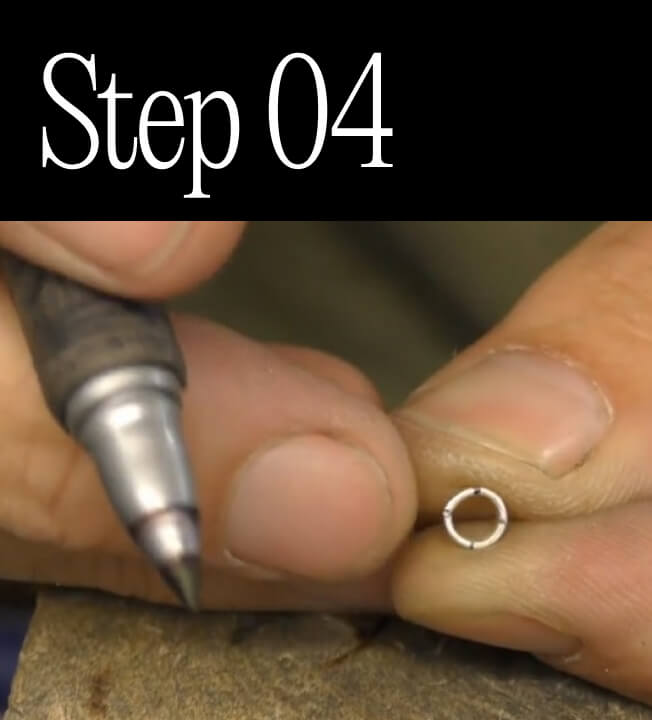
Hard solder the bezel and pickle to remove the oxides. If the bezel is not perfectly round, use a round stake that fits inside and tap it into shape. If the bezel can be seen when you place the stone on top, size it down by cutting a piece out and resoldering. Now mark four equal points and check that the spacing is correct with your dividers. One marking needs to be on the joint.
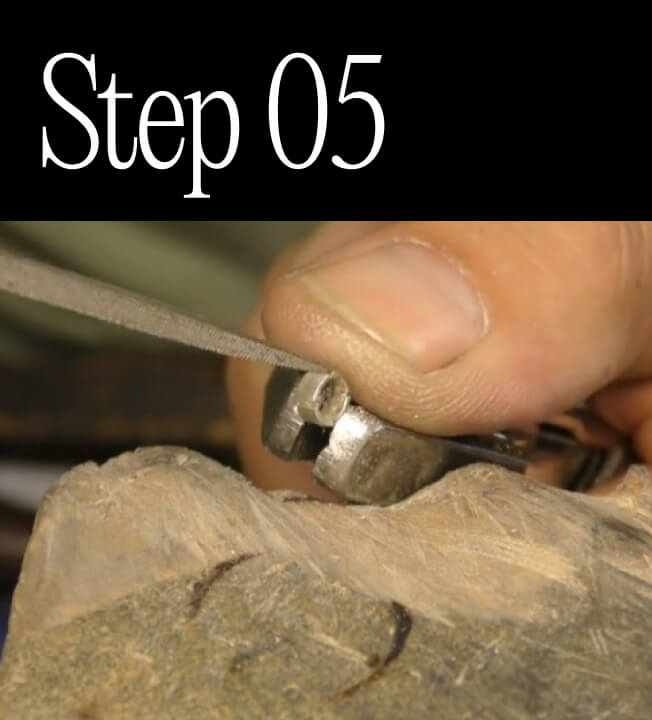
Grip the bezel firmly in your parallel pliers and cut a line with your piercing saw along the outside of the bezel at the four points. Follow this cut with a three-square needle file, then widen the grooves further with a square needle file. Take your time and ensure you don’t cut the grooves at an angle.
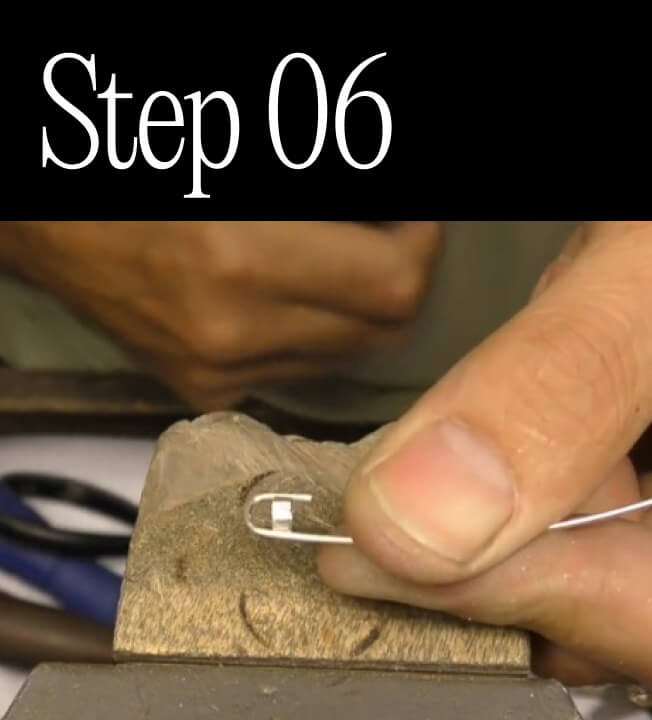
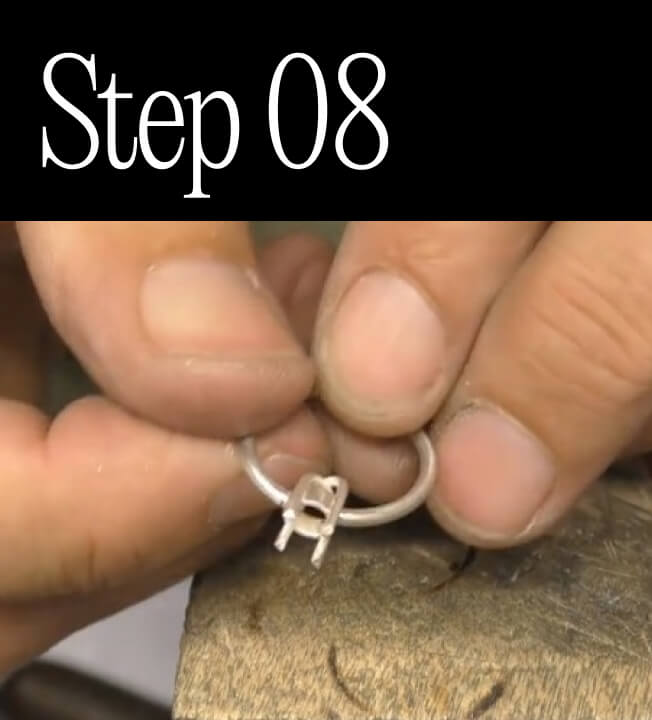
To attach the 1mm claw wire, use your round nose pliers to form two ‘U’ shapes. The straight sides of the ‘U’s must be parallel and fit perfectly into opposite bezel grooves. Adjust the shape as required. Make one of the ‘U’ shapes a little longer. This can then fit over the shorter wire.

The components of the setting should hold together securely before soldering, but if you have difficulty fixing the three components simultaneously, just solder one ‘U’ at a time. Ensure there is at least 2mm of extra wire at the top of the setting. Solder with medium-grade solder. Pickle and clean off any excess solder with needle files.
Don’t cut off the underwire just yet. Keeping it attached reduces the chance of the claws dropping off during the final solder operation. Set your vernier gauge to the bezel width (5mm) and mark either side of the solder joint on the ring. Cut the solder section out of the ring. The setting should be able to slot into this space, so make necessary adjustments for your chosen finger size.
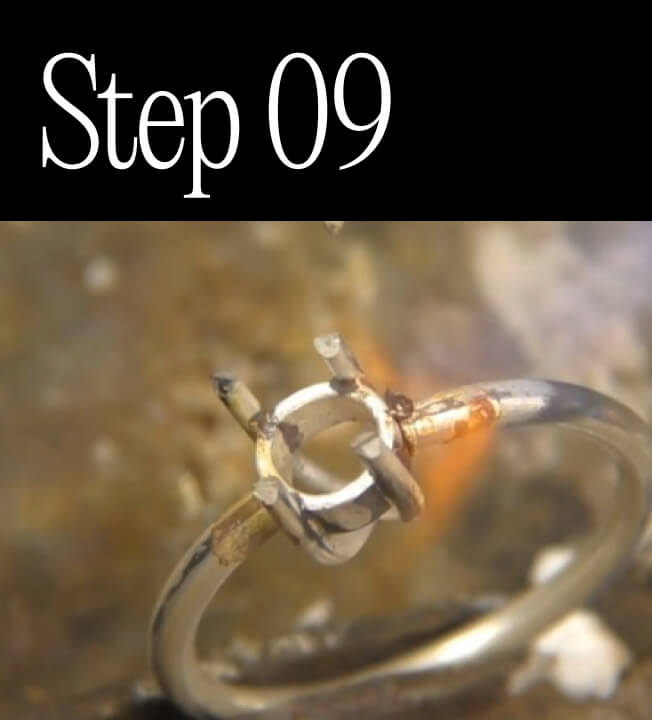
Ensure the setting is perfectly square to the ring and that the ring shoulders are centred between the claws. If you have difficulty keeping the components straight, bur into the setting bezel at the connecting point with a 1.5mm round bur and fit the ring ends into the divots. This will help to line up the components and keep it all together during soldering. Use easy-grade solder.

Once pickled, you can cut off the excess wire at the bottom of the setting and trim the top claws to around 2mm above the bezel. Clean up the solder joints and prepare for polishing with emery paper. Polish around the setting before fitting the stone.

The stone should sit atop the setting, covering around one-third of the claw’s thickness. Now, use your piercing saw to start cutting the seating/bearing on the inside of the claws, just above the top of the bezel where the stone girdle will sit. Do not cut any more than one-third of the claw thickness.

Follow the saw cut with a small ball bur (0.7mm) or a 1mm tapered bur. Bur out enough of the claw to fit the stone. Two side-by-side claws will need to be shifted out slightly to fit the stone into the setting. Push the claws down onto the crown of the stone with a pusher. The claw tips can now be burnished onto the stone using a shaped pusher or a large beading tool. Now remove any tool marks and give the ring a final polish.
For the video of this project go to jewellerytrainingsolutions.com.au/courses/stone-set-stacker-ring
Check out the other courses and options: jewellerytrainingsolutions.com.au