This tutorial will show you how to make a simple tubular bayonet catch for a bracelet or necklace. This type of catch is easy to make and is a great exercise for advanced students and second-year apprentices.
Step 1:
To make the body of the catch, you will need a piece of tube over 20mm long with an outside diameter of around 5.5mm and a wall thickness of no less than 0.8mm. For the bolt catch, make sure you have a piece of tube that fits snuggly inside. The online course includes instructions on how to make a chenier tube.
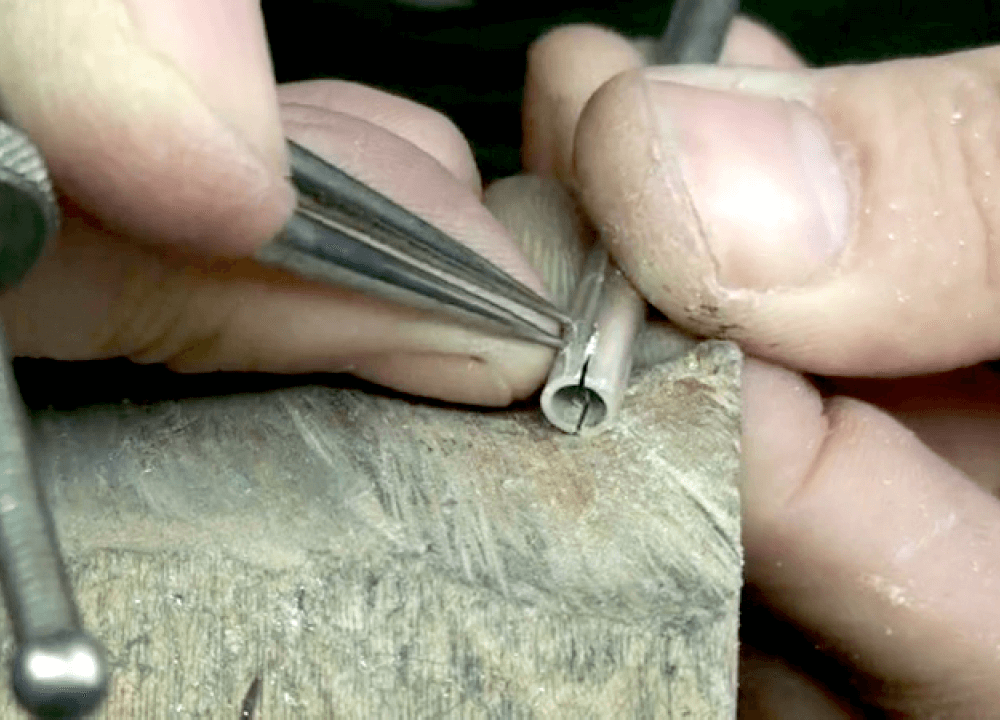
Step 2:
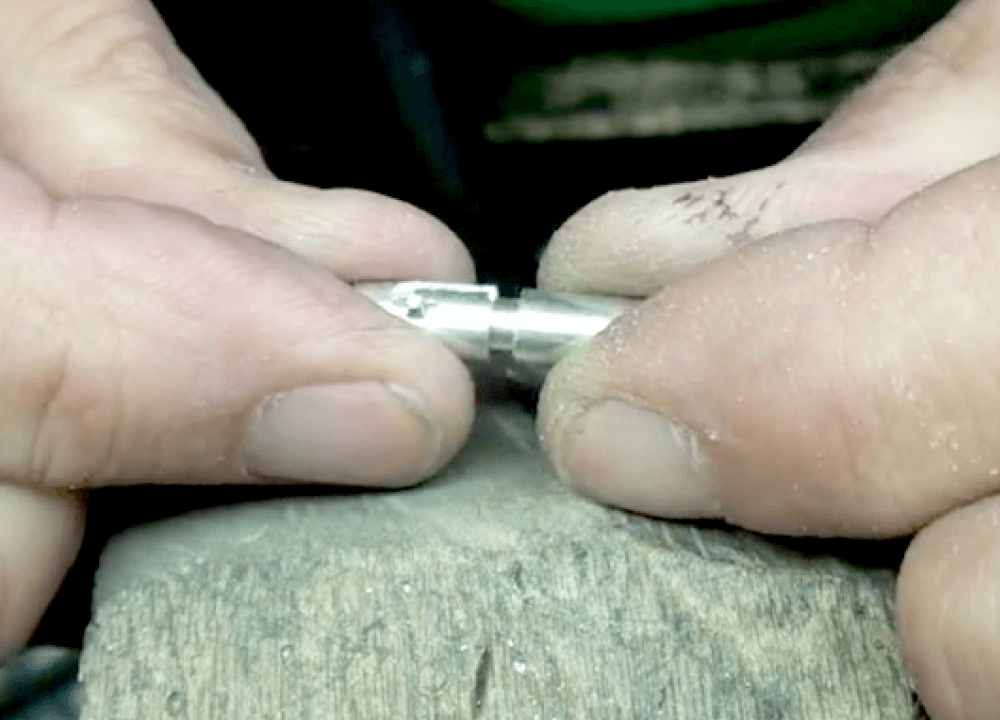
Start by making the bolt catch. Square off the end of the smaller tube and mark a perfectly centred line across the top. Now, mark 3mm down from the markings and drill all the way through the tube with a 1mm drill.
Step 3:
Open the holes out until you can fit a piece of 1.1mm round wire. Cut the wire, making sure that there is around a 2mm overhang and then hard solder the wire in place. Now, you can work on the larger tube.
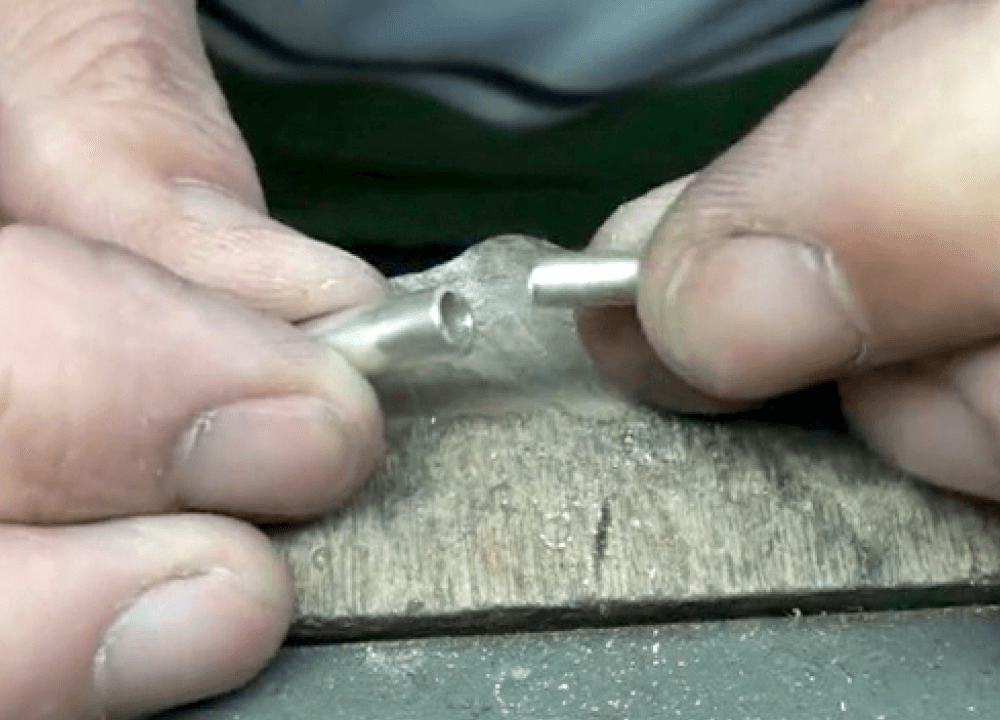
Step 4:
Square off the end and mark a centre line across the top. Now mark 4mm down from the markings and again drill through with the 1mm drill, then open the holes out until the 1.1mm wire fits. Put a mark at 2mm from the left of both holes with your dividers.
Step 5:
Cut a straight line down the tube to the 2mm markings on both sides. With the same 2mm setting on your dividers, scratch a curved marking from the drill hole to the end of the saw cuts. This will look like the letter ‘J’.
Step 6:
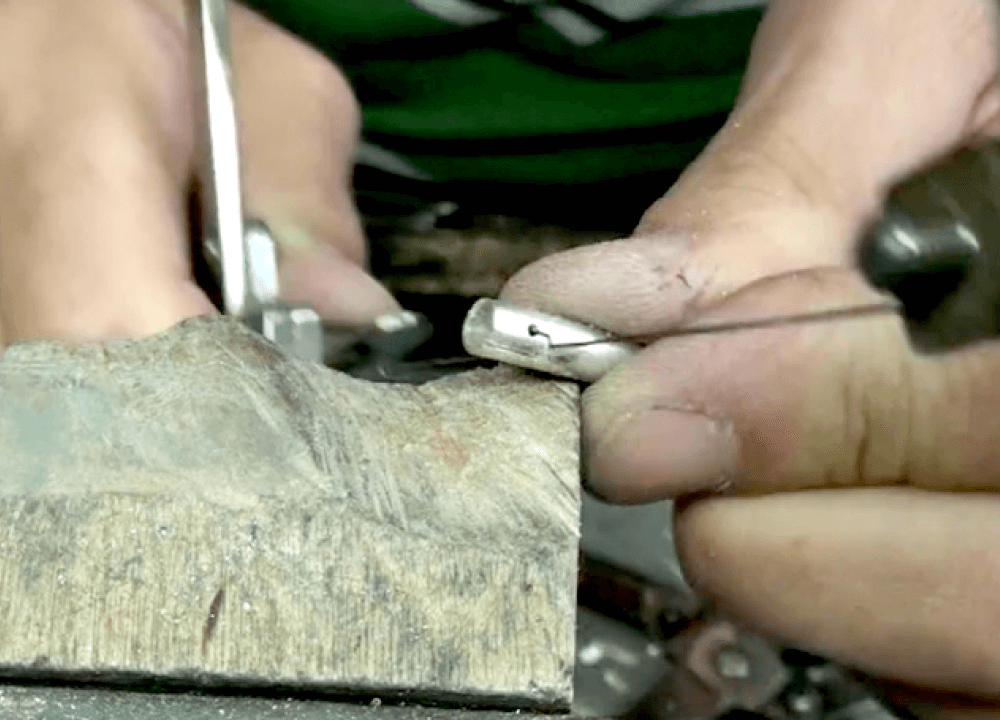
Now, feed your saw blade through the holes and carefully cut around the curved marking. This technique is very tricky and the saw blade can easily wander off the line, so keep checking both sides to ensure you are following the lines.
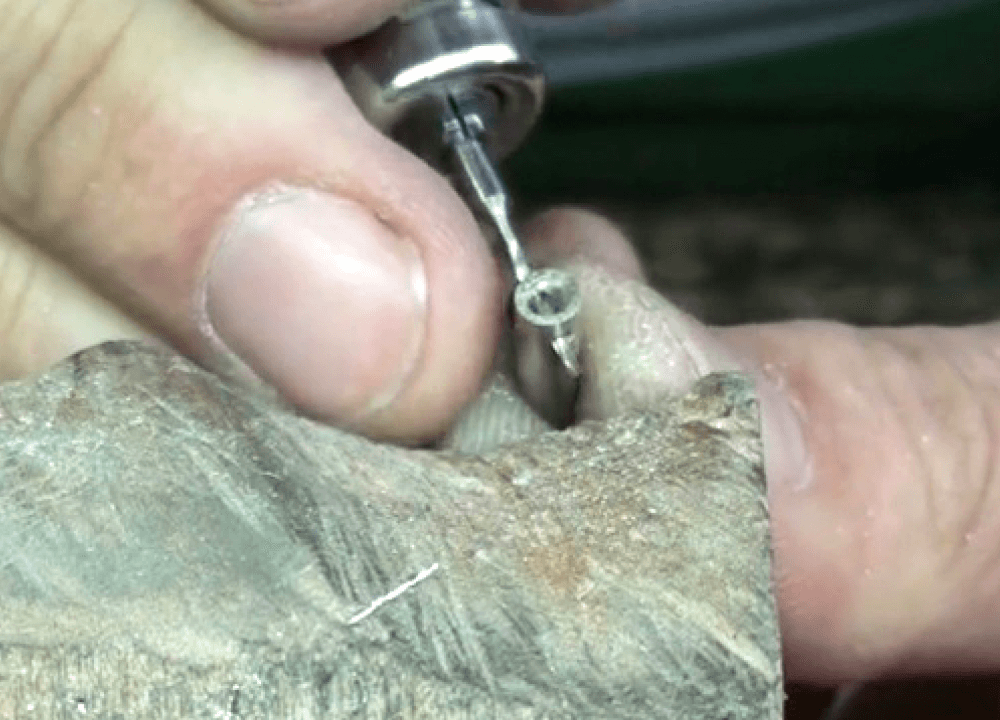
Step 7:
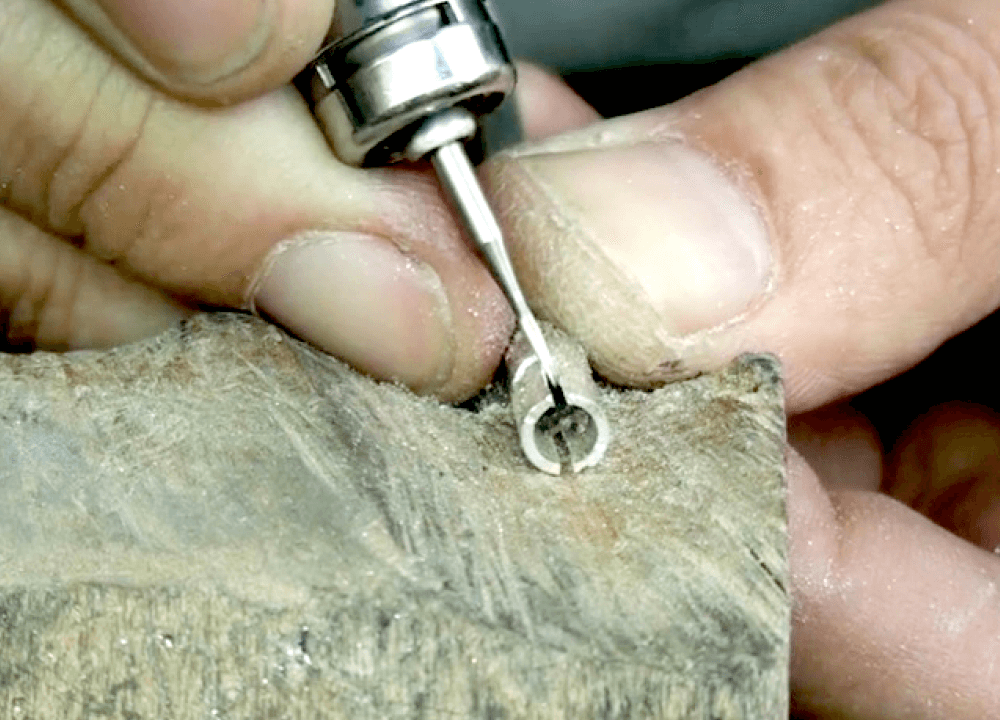
The saw cuts may look a little bit tatty at this stage, but you can now tidy the ‘J’ shaped slots with a 1mm tapered bur. Bur the slots from the top cuts to the drill holes to the width of the bolt wire.
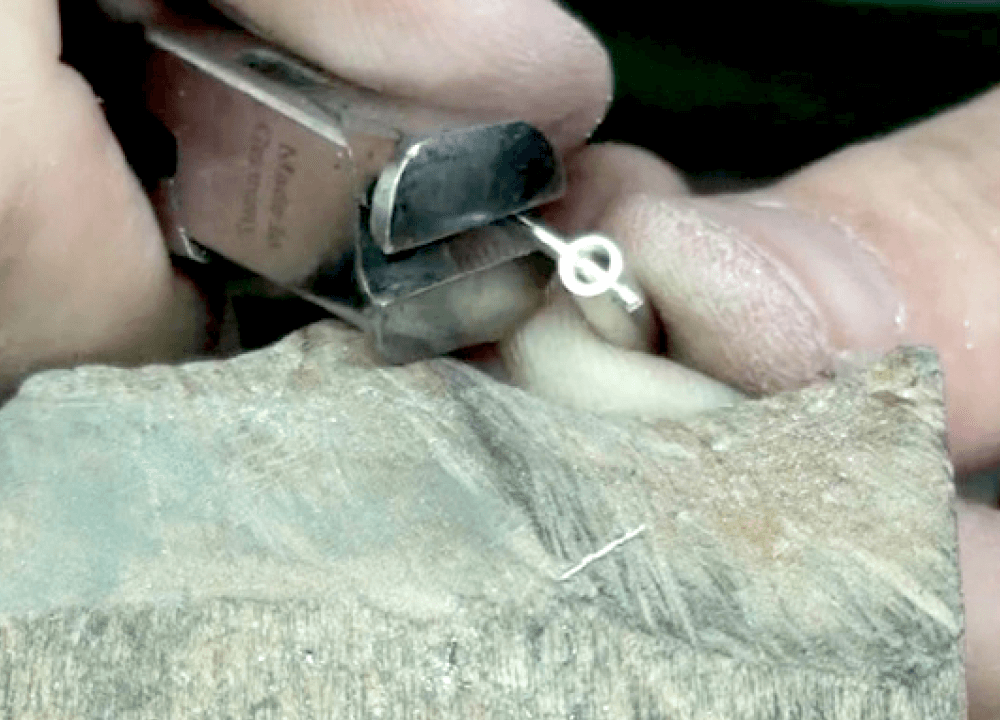
Step 8:
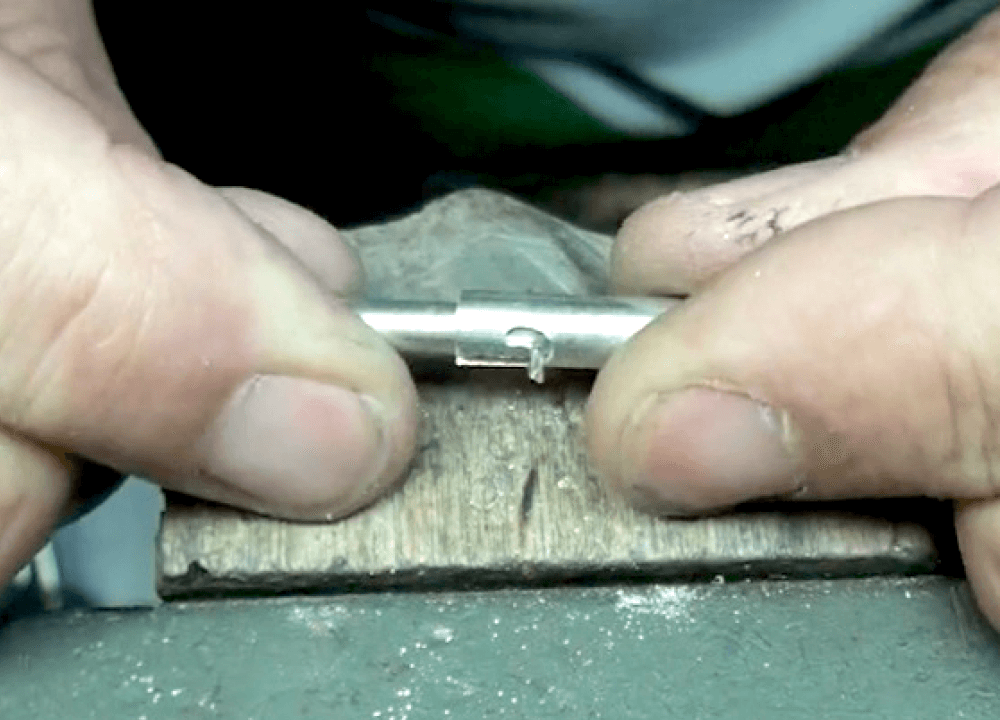
Keep testing it to make sure that the bolt can be inserted into the ‘J’ slots all the way. Once you have made the bolt operational, the larger tube can be cut down to size. Insert the bolt to the lowest point of the ‘J’ and mark off 3mm from the bolt wire on the outer tube. Mark around at this point and carefully cut the excess tube off.
Step 9:
The bolt section needs to be capped with the larger tube. Insert the bolt into the catch body to the lowest point of the ‘J’, then fit the leftover larger tube until there is no gap. Mark this point onto the bolt. Cut off approximately 4mm from the larger tube and fit it up to the marking on the bolt section.
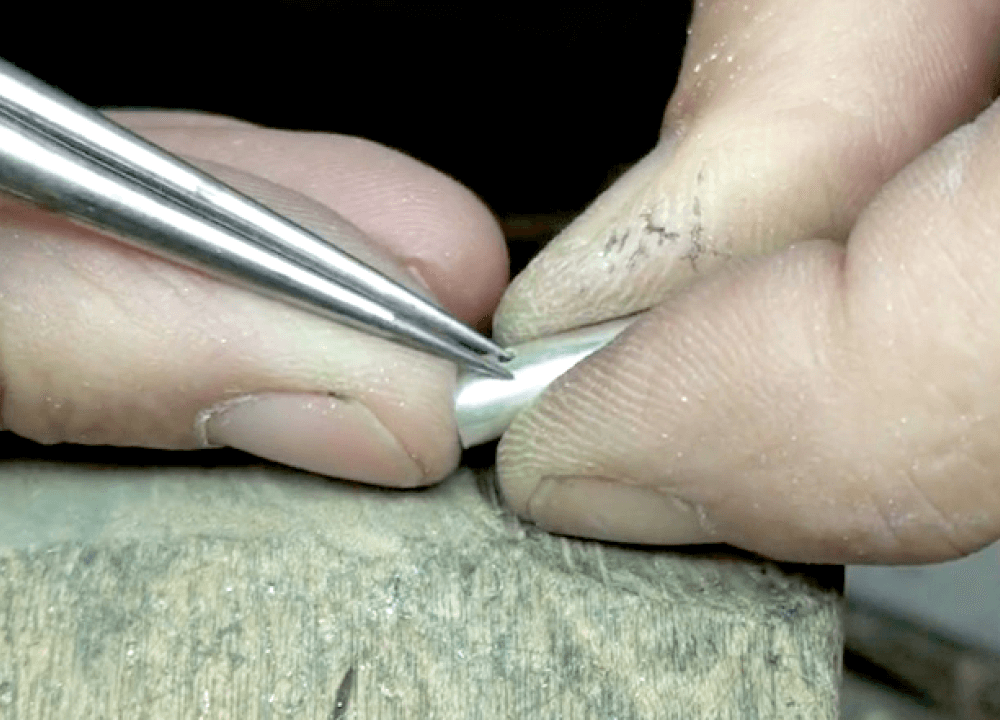
Step 10:
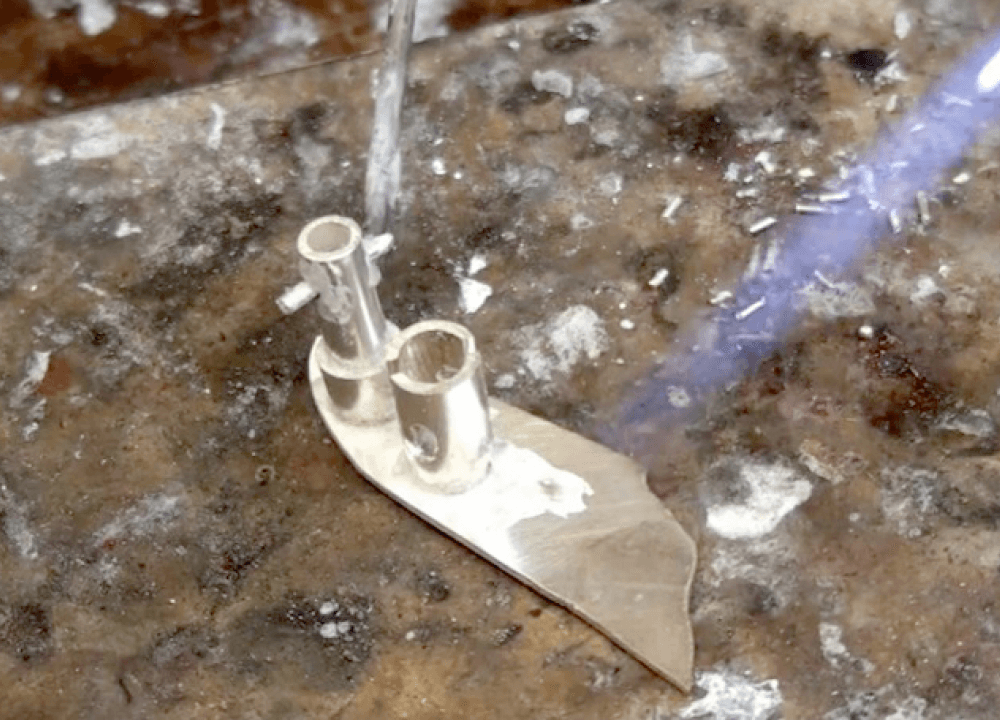
File both ends of the catch perfectly square. Set up both components onto a piece of 0.7mm sheet and flux all the unsoldered joints. Hard solder the components including the bolt tube cap
Step 11:
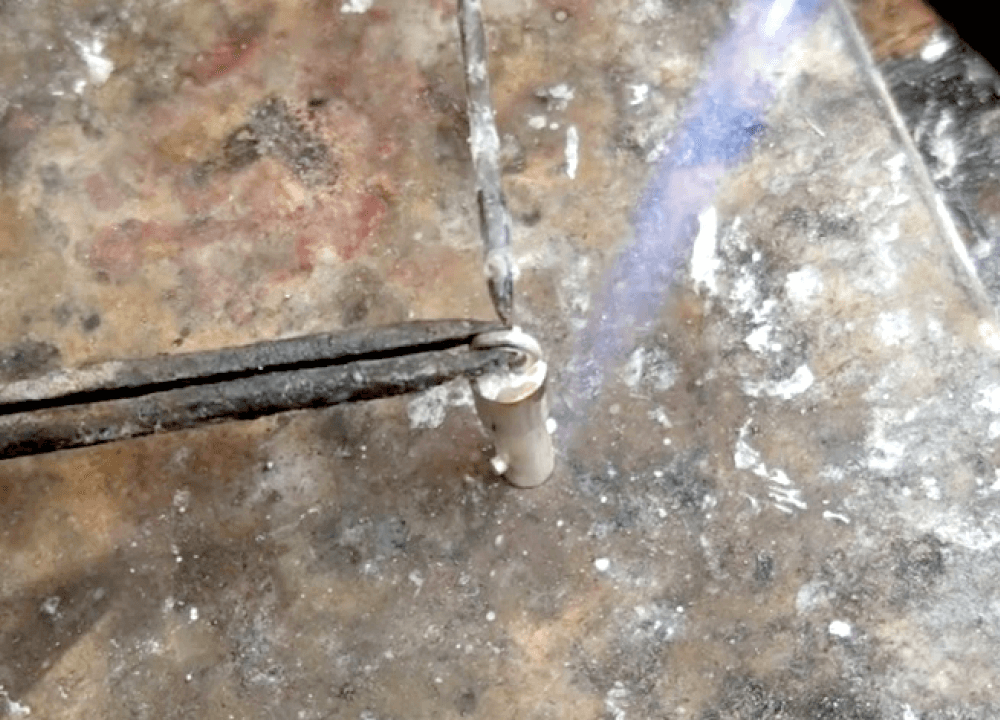
Cut the catch components off the sheet and file the joints flush. Now make two small jump rings. To ensure they line up in the same direction, close the catch and scribe a matching direction line on both ends. Medium solder the jump rings.
Step 12:
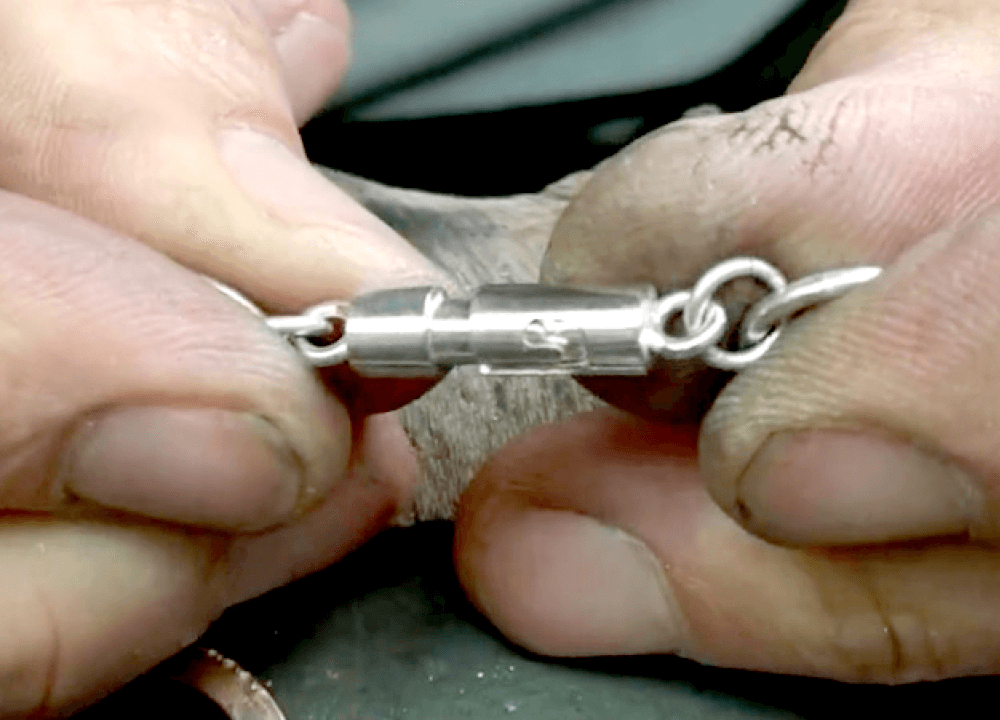
Once you have pickled the catch, carefully clean off any excess solder and sand all surfaces with 1200-grip emery paper. Fit it to your chain, give it a final polish and you are finished!
Jewellery Training Solutions offers a comprehensive online training service. The video lesson for this tutorial can be found at this link: jewellerytrainingsolutions.com.au/courses/bayonet-catch.
Check out other courses at jewellerytrainingsolutions.com.au.
Further reading: