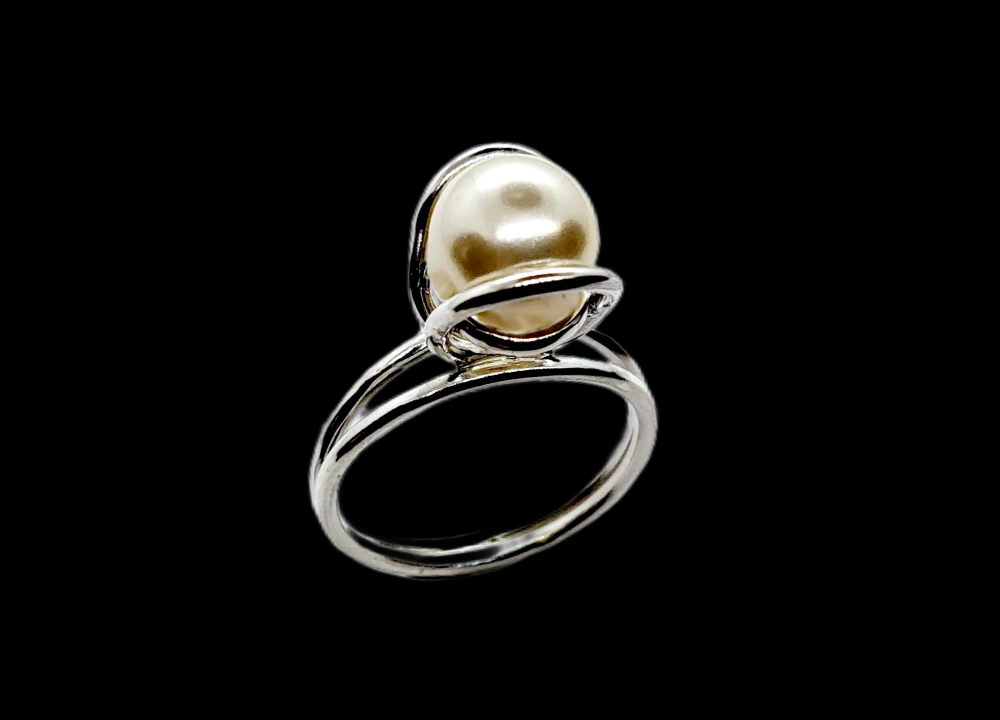
This tutorial will show you how to make a pearl ring constructed with jump rings. This attractive contemporary ring is a great soldering test for students & apprentices.
Step 1:

For this project, you will need 1.4mm x 220mm round wire & a pearl or a bead measuring between 7mm & 9mm. Anneal the wire and wrap it two & a half times around your ring size stick. At this stage, make it four or five sizes smaller than your intended finger size, then push it up the stick to the correct size. I am making this ring a size ‘N’.
Step 2:
Scratch a mark across the coiled wire while on the ring stick and cut the rings at the markings. File the ring’s ends flat and line them up ready for soldering. Use hard-grade solder. Once you pickled the rings, tap them on a bench block to ensure they are perfectly flat.
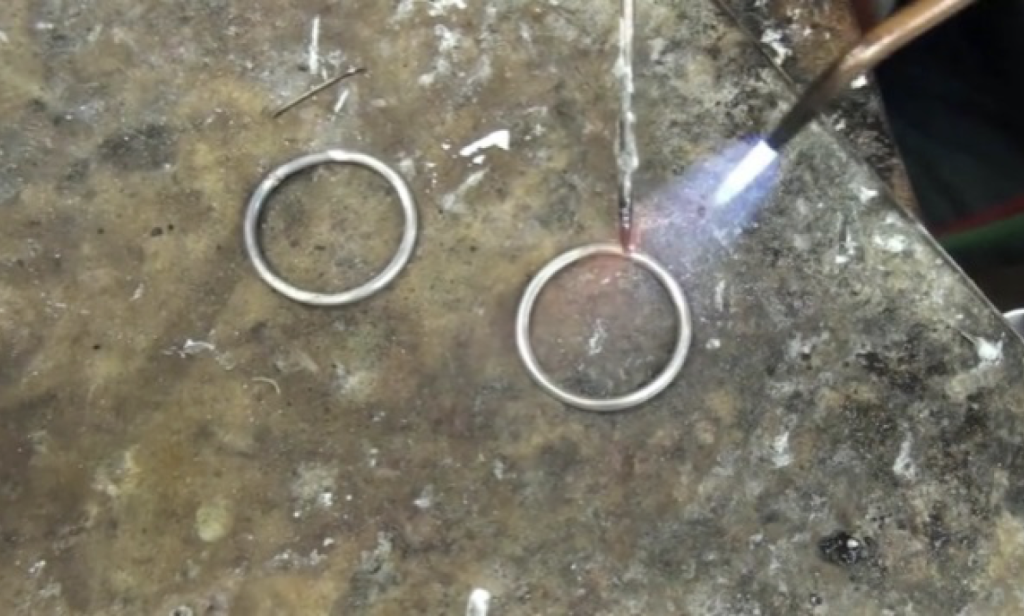
Step 3:
Position the rings on a charcoal block, one on top of the other. Flux halfway around the rings making sure that the previous joints are in the area that will be soldered. Now solder with medium-grade solder. Try not to allow the solder to run past the fluxed area. Using a charcoal block will aid even heat distribution to the bottom ring.
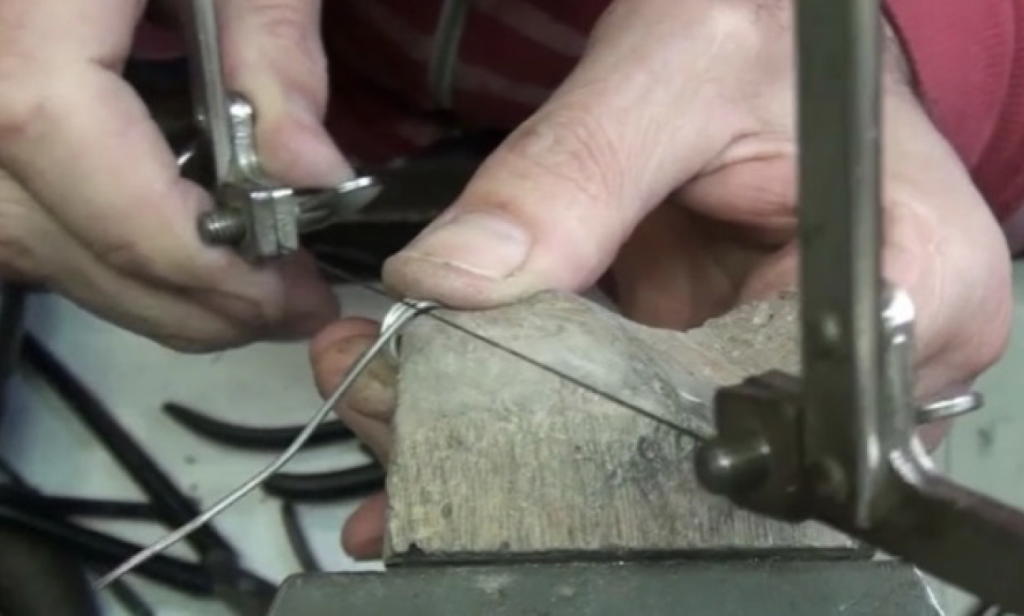
Step 4:
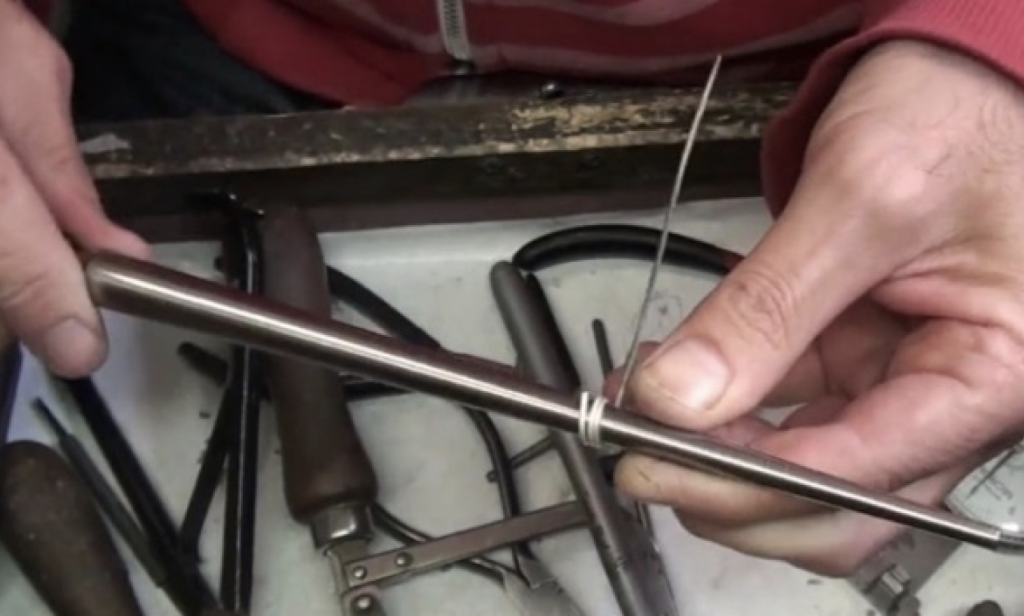
Draw the remainder of the wire down to 1.2mm. To make the setting the correct size for your pearl, make two jump rings with an inside diameter of 0.5mm less than the pearl measurement. Wrap the wire around a mini mandrel two & a half times, and push the coil up to the correct size.
Step 5:
Cut the jump rings from the coil. Line the joints up, flux and solder them using hard-grade solder. Pickle to remove the oxides, then clean any excess solder from the joints.
Step 6:
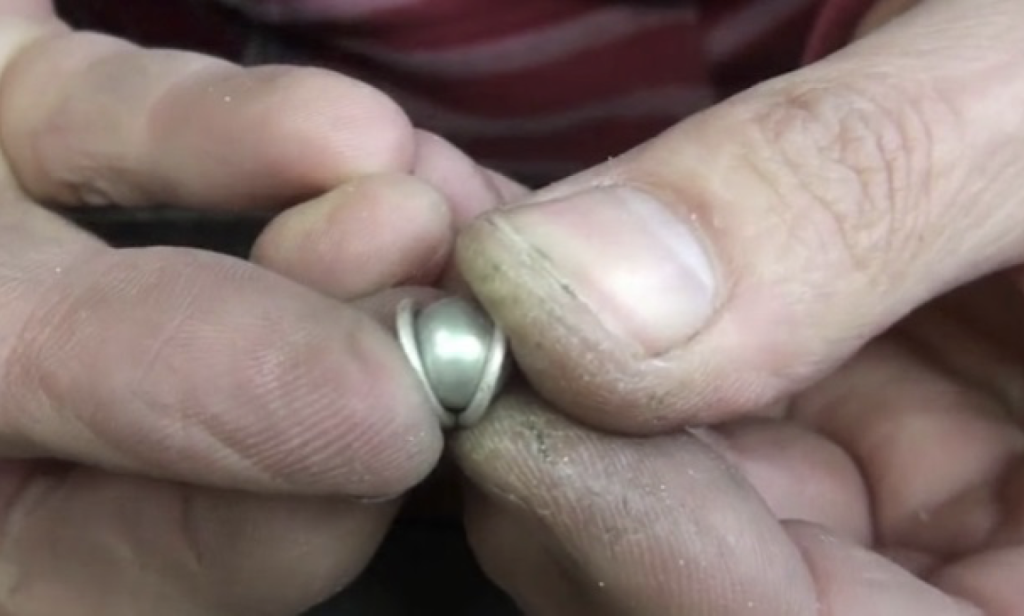
You can now test-fit the rings with your pearl. If the rings are too small, they will not secure the pearl well enough. If they are too big, they will be too close together when you tighten the pearl into place later. Make adjustments as needed.
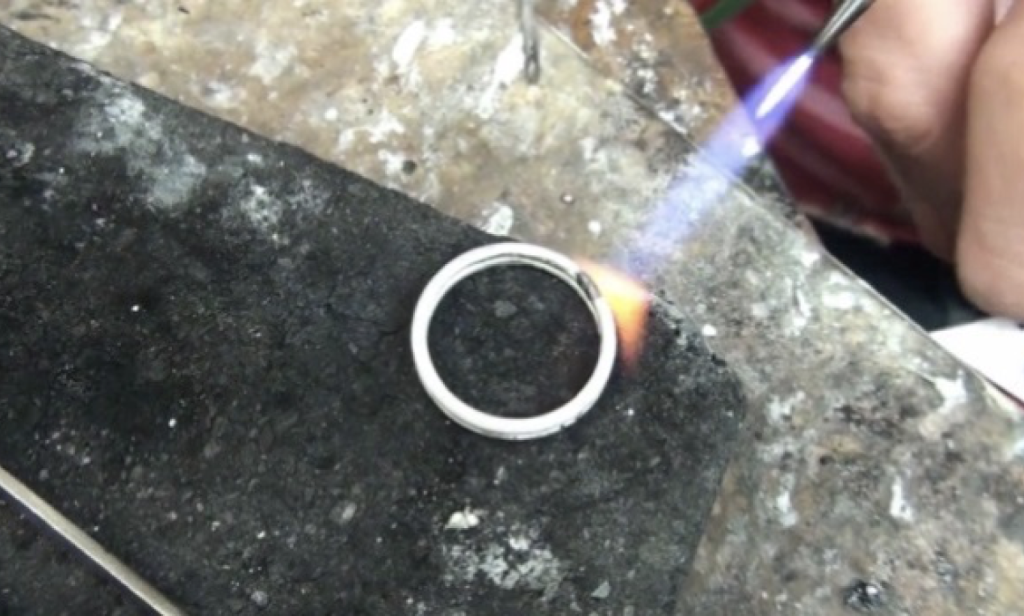
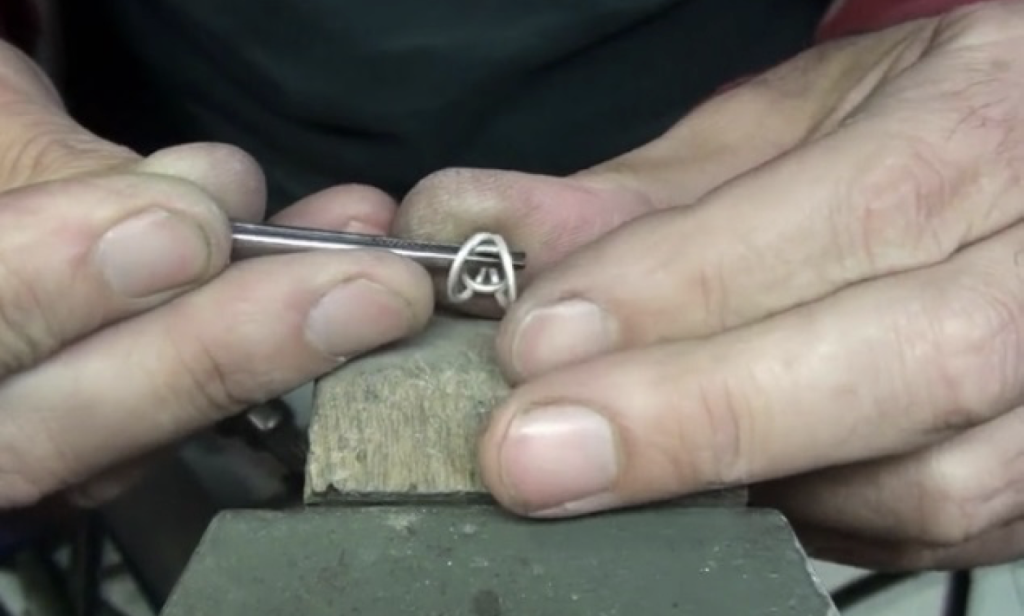
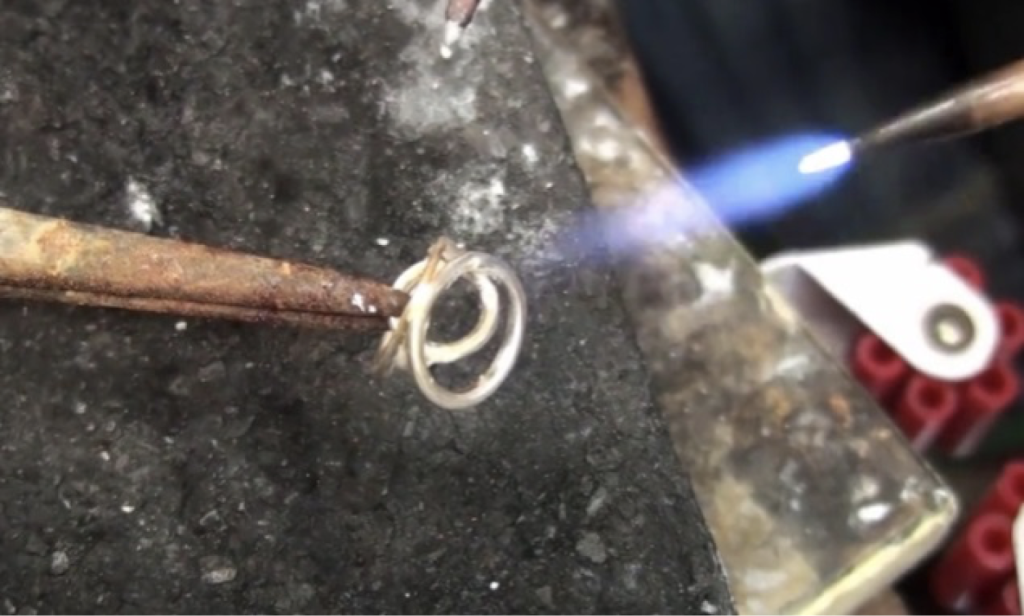
Step 7:

File an angled flat spot on the solder joints so the rings connect at around 35°- 40°. Now set the rings up on your solder mat, and ensure they are parallel and lined up perfectly. Flux and hard solder them together.
Step 8:
Make a jump ring bezel to fit inside the setting with your round nose pliers. It needs to be positioned around three-quarters of the way down into the setting to successfully set the pearl. I advise that you make a 7mm outside diameter jump ring to start with and cut a little out if it needs to go lower into the setting.
Step 9:
The best way to solder the jump ring to the inside of the setting is to hold the jump ring into your third hand, then position the setting onto the jump ring upside down. Ensure that it is lined up perfectly before medium soldering it in place. This is a tricky solder operation, I recommend using an oxidising flame.
Step 10:

Pickle the setting and prepare the ring components for polishing. Prise open the top of the ring with a pen knife just enough to be able to position the setting into the gap. You can now solder the final joints with easy-grade solder, but if you are confident, use medium-grade.
Step 11:
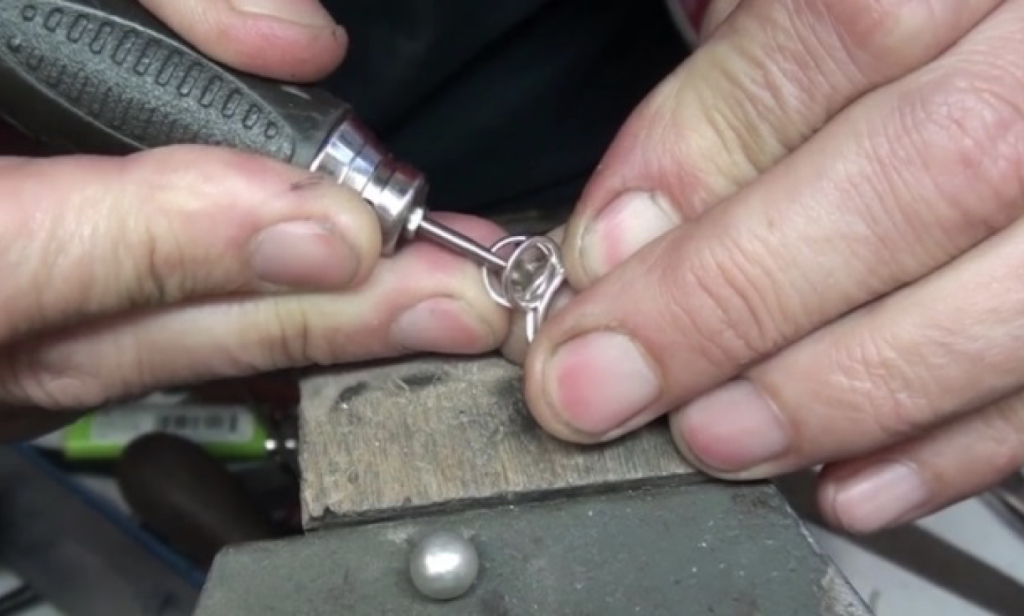
Pickle and clean up the solder joints. Put the ring in the tumbler to polish into the gaps and all around the setting. Countersink the inner jump ring with a ball bur to match the profile of the pearl. This allows the pearl to sit lower in the setting. The setting looks something like a gyroscope!
Step 12:

Now carefully push the pearl into place. It should be a tight fit but it will still be loose. To tighten the setting so that the pearl won’t accidentally fall out, use nylon pliers and carefully squeeze the setting rings from both sides. Give it a final polish and you are finished.
Jewellery Training Solutions offers a comprehensive online training service. The video lesson for this tutorial can be found at this link: jewellerytrainingsolutions.com.au/courses/gyroscope-pearl-ring.
Check out other courses at jewellerytrainingsolutions.com.au.
Further reading: